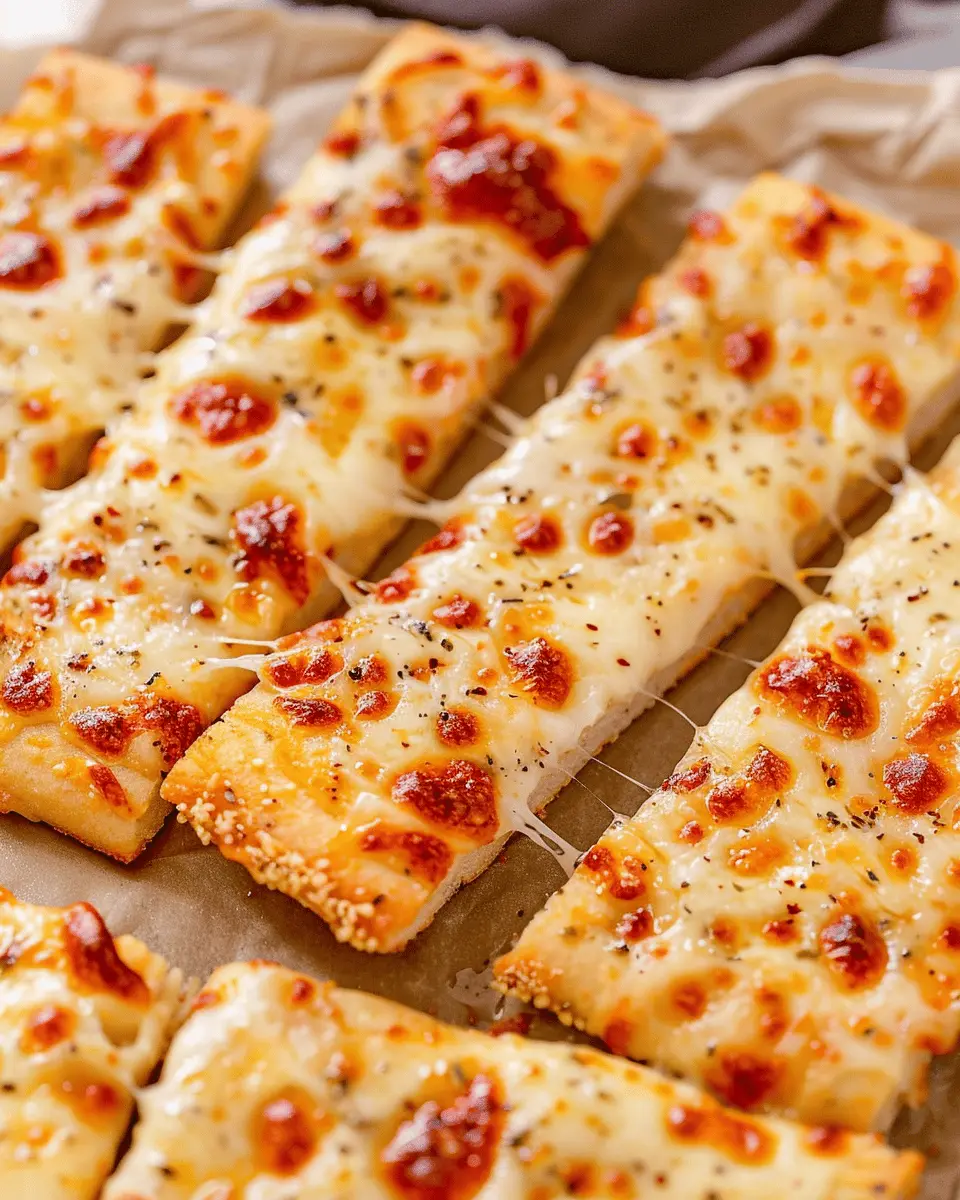
Introduction to Homemade Cheesy Breadsticks
When it comes to comfort food, the appeal of homemade cheesy breadsticks can’t be overlooked. Whether you’re hosting a casual dinner, enjoying a movie night, or simply indulging in a snack, cheesy breadsticks are sure to elevate the experience. Picture this: warm, gooey cheese stretching from a golden, freshly baked breadstick. Doesn’t that sound delightful?
Why Choose Homemade Cheesy Breadsticks?
So, why go the homemade route for your cheesy breadstick cravings? For starters, making them yourself means you can play around with the flavors and ingredients to suit your taste. You can experiment with various cheeses—mozzarella, cheddar, or even some spicy pepper jack—and get creative with toppings like herbs and seasonings. Imagine having a cheesy treat that perfectly complements your favorite dipping sauce, whether that’s marinara, garlic butter, or even a creamy ranch.
Moreover, homemade cheesy breadsticks are a fantastic way to impress guests without spending all day in the kitchen. The process is surprisingly simple! According to a study published by the Culinary Institute of America, cooking at home can increase your culinary skills and boost your confidence in the kitchen. That means these breadsticks could be the start of your culinary journey!
Here are a few reasons why making these cheesy delights at home is a win-win:
- Customizable Ingredients: Want to add turkey bacon or chicken ham? Go for it! This flexibility allows you to cater to dietary needs or personal preferences easily.
- Freshness Guaranteed: There’s nothing like the aroma of freshly baked bread wafting through your home. Plus, you’ll know exactly what is going into your food.
- Cost-Effective: Eating out can get expensive, especially when ordering appetizers. DIY cheesy breadsticks are an economical option that doesn’t compromise on taste.
Whether you’re a seasoned chef or a kitchen newbie, homemade cheesy breadsticks are achievable and rewarding. Join me on this culinary journey, and let’s whip up a batch that will surely become a household favorite! Now, let’s dive into the recipe and get those delicious cheesy breadsticks in the oven.
Ingredients for Homemade Cheesy Breadsticks
Essential ingredients
Creating homemade cheesy breadsticks is a delightful experience, and having the right ingredients makes all the difference. Here’s what you’ll need:
- Pizza dough: Store-bought or homemade, it sets the foundation for your breadsticks.
- Cheese: Choose a melting cheese like mozzarella for that gooey goodness. You can also mix in some cheddar for a sharper flavor.
- Olive oil: Adds a lovely golden color and richness to your breadsticks.
- Garlic powder: This is key for that extra punch of flavor.
- Italian seasoning: A sprinkle of this brings all those Italian vibes right into your kitchen.
Optional ingredients for variety
Feeling adventurous? You can elevate your homemade cheesy breadsticks with some optional ingredients:
- Turkey bacon or chicken ham: Add crumbles for a smoky twist.
- Fresh herbs: Basil or parsley can provide a burst of freshness.
- Red pepper flakes: For a spicy kick, sprinkle these on before baking.
These extras can transform your cheesy treats from delightful to downright extraordinary! When experimenting, consider visiting sites like Food Network or Bon Appétit for inspiration and tips. Who knows? You might stumble upon your new favorite version!
Step-by-Step Preparation of Homemade Cheesy Breadsticks
Making your own homemade cheesy breadsticks is not just a fun kitchen project; it’s a great way to impress friends and family. With a few ingredients and some simple steps, you’ll be well on your way to creating delicious and cheesy treats. Let’s get started!
Gather Your Ingredients and Tools
Before diving into the world of cheesy goodness, take a moment to gather everything you need:
Ingredients:
- 2 cups all-purpose flour
- 1 packet (2 ¼ tsp) instant yeast
- ¾ cup warm water (not hot!)
- 1 tbsp sugar
- 1 tsp salt
- 1 tbsp olive oil
- 1 cup shredded cheese (mozzarella, cheddar, or a blend)
- Optional: seasonings (garlic powder, Italian herbs) for extra flavor
- Optional: Turkey bacon or Chicken ham for a meaty addition
Tools:
- Mixing bowl
- Wooden spoon or spatula
- Kitchen towel or plastic wrap
- Baking sheet
- Parchment paper (for easy cleanup)
Having everything within arm’s reach will streamline the process and keep your cooking experience enjoyable. For more tips on kitchen tools, check out this insightful guide.
Make the Dough
In a mixing bowl, combine the warm water, sugar, and yeast. Let it sit for about 5 minutes until it becomes frothy—this means your yeast is activated and ready to work its magic!
Next, add the flour, salt, and olive oil. Mix until the dough starts coming together. If you’re a fan of a good workout, knead the dough by hand for about 8-10 minutes. If you prefer an easier method, use a stand mixer with a dough hook on medium speed for about 5 minutes. The goal is to create a soft, elastic dough that isn’t too sticky.
Let the Dough Rise
Once your dough is ready, place it in a lightly greased bowl and cover it with a kitchen towel or plastic wrap. Let it rise in a warm area until it doubles in size—around 1 hour. This rising time is crucial, so use this opportunity to clean up your kitchen or plan out your upcoming cheesy masterpiece.
Shape the Breadsticks
After your dough has risen, punch it down gently to release the air. Transfer it to a floured surface and roll it out into a rectangle shape, about ½ inch thick. From here, you can cut it into strips—make them as thick or thin as you like!
For some added fun, twist the strips to create visually appealing spirals. If you’re feeling adventurous, you might even try making a cheesy homemade cheesy breadsticks with twists that would be a hit at any party!
Add the Cheese and Seasonings
Now comes the best part: cheese! Sprinkle the shredded cheese generously over the strips. If you want to elevate the flavors, add garlic powder, Italian herbs, or even finely chopped Turkey bacon or Chicken ham for extra deliciousness. Fold the dough over the cheese and toppings, pinching the edges to secure everything inside.
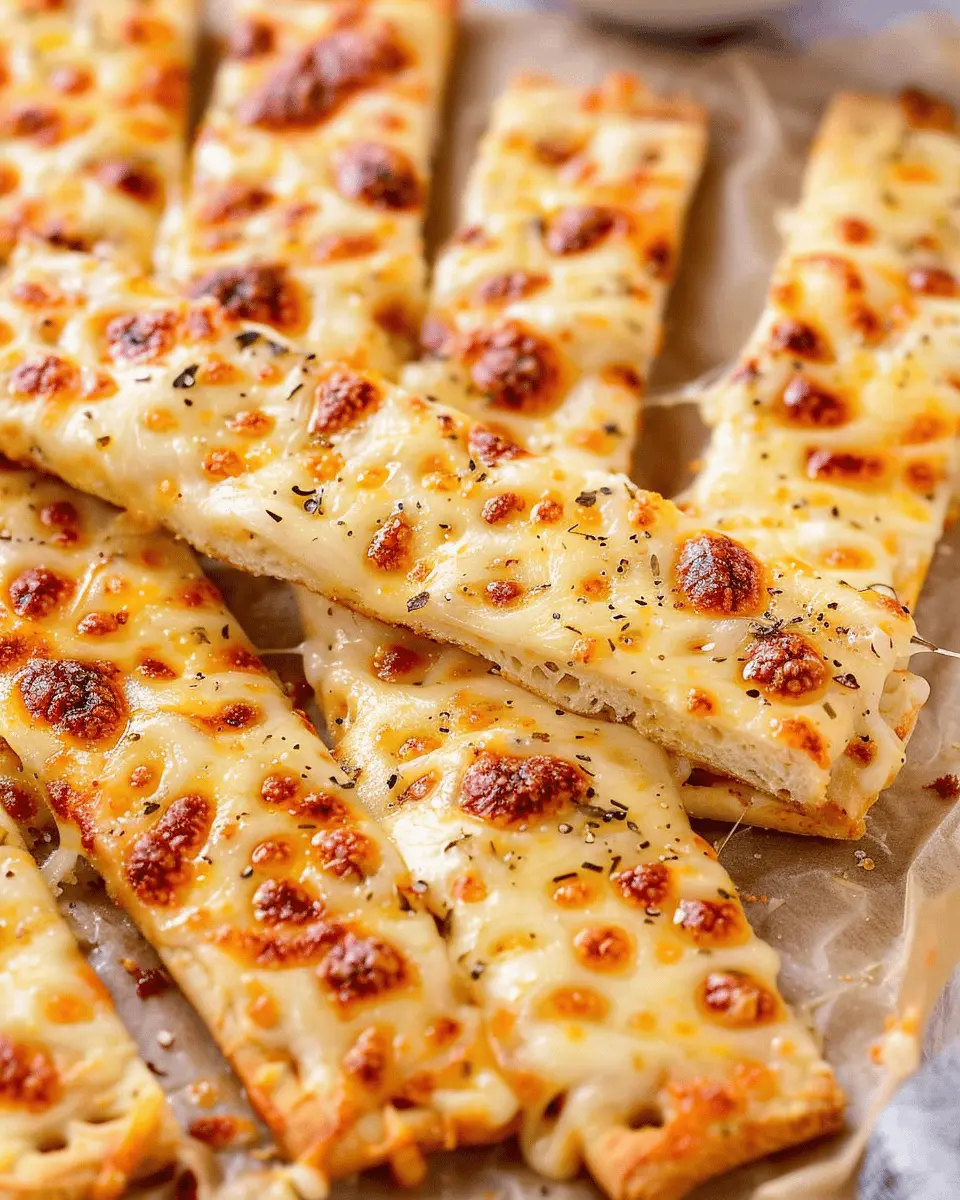
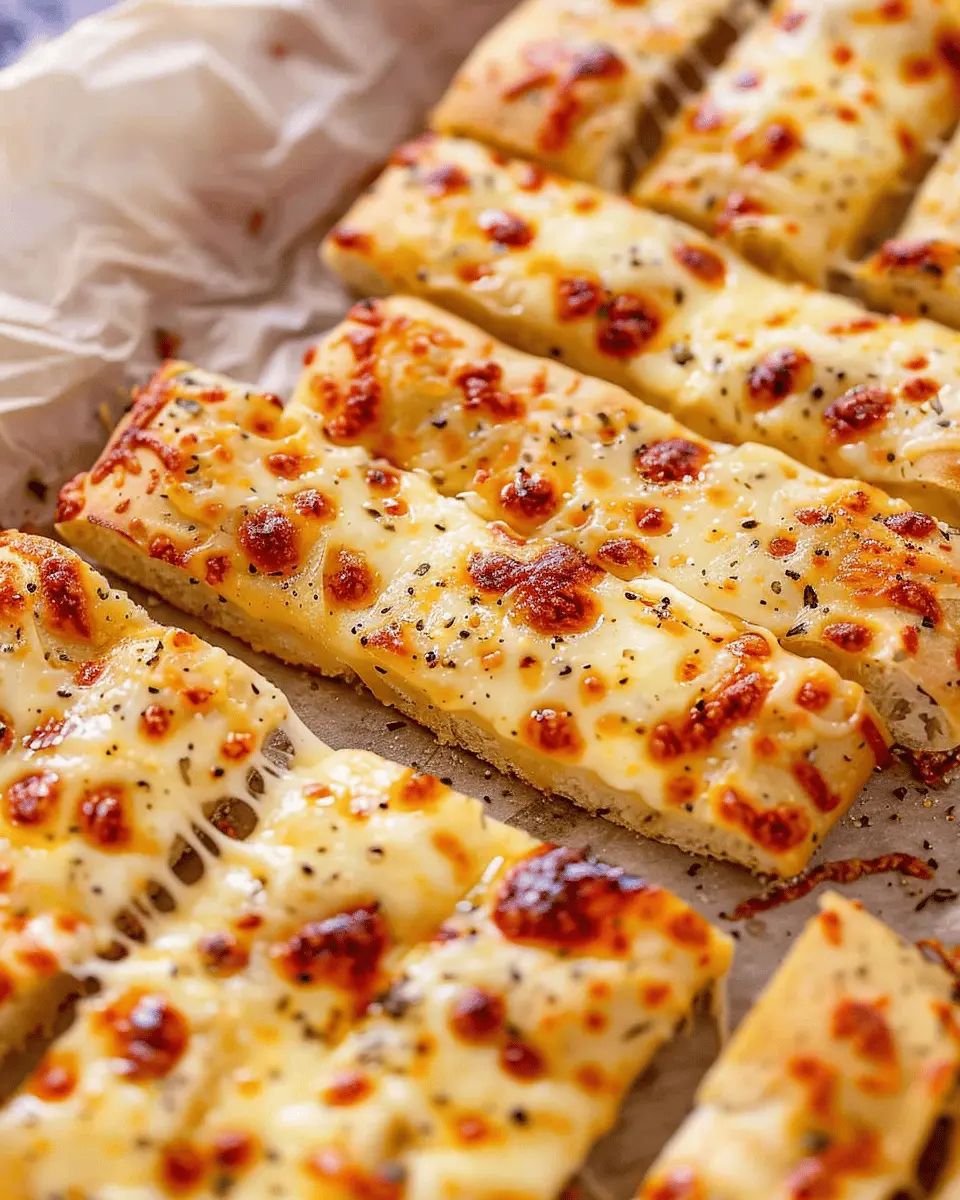
Bake Until Golden
Preheat your oven to 375°F (190°C). Line your baking sheet with parchment paper and place your shaped breadsticks on it. Give them a light brush of olive oil for a gorgeous golden finish and bake for about 15-20 minutes, or until they are golden brown and ooze with cheese.
You’ll know they’re ready by the irresistible aroma wafting through your home, drawing everyone into your kitchen!
When they are done, pull them out and allow them to cool slightly before devouring.
Making homemade cheesy breadsticks is an easy way to treat yourself and your loved ones to a delightful snack. Feel free to experiment with different cheeses and toppings! Your new favorite recipe is just steps away from being perfected in your kitchen!

Variations on Homemade Cheesy Breadsticks
Garlic Butter Cheesy Breadsticks
One of the most beloved twists on homemade cheesy breadsticks is the classic garlic butter version. Picture this: warm breadsticks topped with a luscious mix of melted butter, minced garlic, and herbs. To whip these up, simply melt 1/2 cup of butter, whisk in 2–3 cloves of minced garlic, and brush this heavenly mixture on your breadsticks before baking. The aroma will be irresistible! For an extra touch, sprinkle freshly grated Parmesan over the top just before serving. Pair these with your favorite marinara sauce for dipping, and you’ve elevated snack time to a whole new level.
Herbed Cheesy Wonder
If you’re a fan of homemade cheesy breadsticks bursting with flavor, try adding fresh herbs. Incorporating herbs like basil, oregano, and thyme into your cheese blend can transform your breadsticks into a fragrant delight. Just mix 1 tablespoon of each herb into your cheese before spreading it over the dough. This not only adds flavor but also makes for a beautiful presentation. You might even consider topping with a sprinkle of sea salt for that perfect finish!
Spicy Cheesy Breadsticks with Jalapeños
For those who crave a little heat, spicy cheesy breadsticks are a must-try. Chopped jalapeños mixed into your cheese blend will give an exciting kick. If you prefer an extra burst of flavor, consider adding a pinch of cayenne pepper or smoked paprika to the mix. Now that’s what I call a flavor explosion! These spiced delights pair beautifully with a creamy ranch dip or a refreshing cucumber salad, balancing out the heat perfectly.
By experimenting with these delicious variations, you can make your homemade cheesy breadsticks a hit at any gathering. Which variation are you going to try first? For more tips and creative ideas, check out resources on herb gardening or loaves perfect for dipping!
Cooking Tips and Notes for Homemade Cheesy Breadsticks
Common Mistakes to Avoid
When crafting homemade cheesy breadsticks, a few pitfalls can hinder your cheesy masterpiece. Here’s what to watch out for:
- Over-kneading the dough: It’s tempting to keep kneading, but too much will lead to tough breadsticks. Aim for a smooth, elastic texture without overdoing it.
- Using cold ingredients: For the best results, ensure your ingredients, especially cheese and butter, are at room temperature. This helps them meld beautifully.
- Skipping the rest period: Allow your dough to rise adequately. Rushing this step can yield dense breadsticks instead of airy ones.
Storage Tips for Leftovers
Got some cheesy breadsticks left? Lucky you! Here’s how to keep them fresh:
- Cooling and wrapping: Let them cool completely before wrapping them in plastic wrap or aluminum foil to prevent sogginess.
- Refrigeration: Store in the fridge for up to three days. For longer storage, consider freezing them.
- Reheating: Pop them in the oven at 350°F for about 10 minutes to regain that delightful crispness. Alternatively, a toaster oven works wonders too!
By following these simple tips, you’ll enhance your culinary experience and the overall enjoyment of your homemade cheesy breadsticks! For more expert advice on bread baking, check out the King Arthur Baking Company for detailed guides and resources.
Serving Suggestions for Homemade Cheesy Breadsticks
Pairing with Marinara Sauce
What’s better than homemade cheesy breadsticks? Dipping them in a rich, tangy marinara sauce! The contrast of flavors is truly delightful, enhancing the cheesy goodness of your breadsticks. You can whip up a quick marinara using crushed tomatoes, garlic, oregano, and basil, or grab a jar of your favorite store-bought version. Have you ever tried adding a sprinkle of red pepper flakes for an extra kick? Your taste buds will thank you!
Serving with Soups and Salads
Homemade cheesy breadsticks are the ultimate sidekick to soups and salads. They add a satisfying crunch and a savory depth to lighter meals. Picture a creamy tomato soup or a classic Caesar salad complemented perfectly with your cheesy delight. This perfect pairing not only elevates your meal but also creates a heartier option for brunch or dinner gatherings.
Creative Presentation Ideas
When it comes to serving, don’t shy away from creativity! Arrange your homemade cheesy breadsticks in a tall glass for a rustic look or lay them on a wooden platter alongside a variety of dips. Maybe add bubbles to your mix by pairing them with sparkling water infused with lemon or herbs. These fun presentation ideas will surely impress your guests and make your meal feel special!
Looking for more inspiration? Check out these soup and salad recipes to see how well they pair with your homemade cheesy breadsticks!
Time Breakdown for Homemade Cheesy Breadsticks
When you’re ready to indulge in some homemade cheesy breadsticks, it helps to know exactly how much time you’ll need. Here’s a handy breakdown:
Preparation Time
Expect to spend about 15-20 minutes measuring and mixing your dough. This is the fun part; don’t be afraid to get a little messy with the cheese!
Rising Time
You’ll want to let your dough rise for about 1 hour. This is essential for achieving that perfect texture. Use the time to prep any toppings or your favorite dipping sauces!
Baking Time
Once your dough has risen, pop it into the oven for 15-20 minutes. The aroma that fills your kitchen will be irresistible!
Total Time
All in all, you’re looking at about 1 hour and 35 minutes from start to finish for these delicious homemade cheesy breadsticks. Perfect for a cozy dinner or a fun party snack!
For some extra inspiration, check out this article on baking techniques from Serious Eats or nutritional tips from EatThis.
Nutritional Facts for Homemade Cheesy Breadsticks
Calories per serving
When indulging in homemade cheesy breadsticks, it’s important to keep track of calories. On average, each serving packs around 200-250 calories, depending on the cheese type and richness of the dough. If you’re watching your intake, consider using less cheese or a whole-grain flour alternative. You can check out the USDA’s FoodData Central for more detailed calorie information.
Protein content
These delicious breadsticks are not just a snack; they also offer a good amount of protein. Each serving typically contains about 8-10 grams, largely coming from the cheese. For those looking to boost their protein intake, adding a sprinkle of nutritional yeast or using cottage cheese in the dough can elevate the protein content while maintaining that cheesy essence.
Sodium levels
One thing to keep in mind is the sodium levels. Depending on the cheese used and whether you add seasoning, each serving can have around 400-600 mg of sodium. For a healthier twist, opt for lower-sodium cheese and control the salt added to the dough. It’s all about balance! Knowing your sodium intake is essential, especially if you’re managing your heart health; the American Heart Association provides great guidelines on this topic.
With these nutritional insights, you can enjoy your homemade cheesy breadsticks guilt-free, knowing exactly what you’re savoring!
FAQs about Homemade Cheesy Breadsticks
Can I freeze cheesy breadsticks?
Absolutely! Homemade cheesy breadsticks are perfect for freezing, making them a fantastic option for meal prep or snacks on the go. After baking, allow the breadsticks to cool completely. Then, wrap them tightly in plastic wrap or aluminum foil, and place them in a freezer-safe bag or container. When you’re ready to enjoy them, simply reheat in the oven at 350°F (175°C) for about 10-15 minutes until heated through.
How do I make them crispier?
If you’re looking to up your game and achieve crispy homemade cheesy breadsticks, consider these simple tips:
- Use a pizza stone: Preheating a pizza stone can create a lovely, crispy bottom crust.
- Baking time: Don’t be afraid to let them bake a little longer; just keep an eye to prevent burning.
- Olive oil or butter: Brush the tops with olive oil or melted butter before baking for an extra crisp.
- Broil briefly: A quick broil in the last couple of minutes can give your breadsticks that golden finish.
What cheeses work best for cheesy breadsticks?
The beauty of homemade cheesy breadsticks is the versatility of cheese! While mozzarella is a classic choice due to its great meltability, you can mix and match with:
- Parmesan: Adds a rich, nutty flavor.
- Cheddar: For a sharper taste.
- Provolone: If you want to get a little fancy!
- Monterey Jack: Offers a creamy texture.
Feel free to experiment—combining various cheeses can elevate your breadsticks to gourmet status. Pair them with your favorite dipping sauce, and you’re in for a treat!
Curious about other cheese options? Explore resources like Cheese.com for more inspiration!
Conclusion on Homemade Cheesy Breadsticks
Recap of benefits and encouragement to try the recipe
Homemade cheesy breadsticks are not just a delightful snack; they’re a versatile dish that can elevate any meal or serve as a crowd-pleasing appetizer. The simplicity of the recipe allows even novice cooks to create something truly delicious without too much fuss. Plus, customizing your homemade cheesy breadsticks with various cheeses or toppings makes them even more exciting!
Whether you’re enjoying a cozy night in or hosting friends for a game night, these breadsticks are sure to impress. So why wait? Roll up your sleeves, gather your ingredients, and let your culinary creativity shine. You might just discover a new favorite in your recipe collection! For more creative ideas, check out expert insights on homemade snacks at Epicurious.
Homemade Cheesy Breadsticks: Easy and Indulgent Family Treats

Deliciously cheesy and easy to make, these homemade breadsticks are perfect for family gatherings.
- Prep Time: 15 minutes
- Cook Time: 20 minutes
- Total Time: 35 minutes
- Yield: 12 breadsticks 1x
- Category: Appetizers
- Method: Baking
- Cuisine: American
- Diet: Vegetarian
Ingredients
- 2 cups all-purpose flour
- 1 cup shredded mozzarella cheese
- 1 tablespoon sugar
- 1 teaspoon salt
- 1 tablespoon baking powder
- 1 cup milk
- 1/4 cup melted butter
- 1 teaspoon garlic powder
- 1/2 teaspoon dried oregano
Instructions
- Preheat the oven to 400°F (200°C).
- In a bowl, mix the flour, sugar, salt, and baking powder.
- Add milk and melted butter, mixing until a dough forms.
- Fold in the mozzarella cheese and herbs.
- Roll out the dough and cut it into stick shapes.
- Place the dough sticks on a baking sheet.
- Bake for 15-20 minutes or until golden brown.
Notes
- Serve warm with marinara sauce for dipping.
- Experiment with different cheeses for unique flavors.
Nutrition
- Serving Size: 2 breadsticks
- Calories: 150
- Sugar: 1g
- Sodium: 300mg
- Fat: 6g
- Saturated Fat: 3g
- Unsaturated Fat: 2g
- Trans Fat: 0g
- Carbohydrates: 20g
- Fiber: 1g
- Protein: 5g
- Cholesterol: 15mg
Keywords: Homemade Cheesy Breadsticks