Introduction to Pumpkin Scones
Why are pumpkin scones a delightful homemade treat?
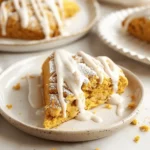
Ah, pumpkin scones—these little delights are the epitome of autumn comfort baked into a perfectly flaky treat. Imagine gathering with friends or family, sipping a warm beverage, and indulging in a scone that not only whispers of pumpkin spice but also hugs your soul with warmth. What makes these delightful pastries so irresistible?
First off, the flavor profile of pumpkin scones is simply enchanting. Combining the earthy sweetness of pumpkin with a hint of cinnamon and nutmeg creates a cozy aroma that instantly lifts your spirits. (If you’re keen to elevate your scone game, you might want to look at sources such as The Spruce Eats, which offers great insight into baking techniques.)
Moreover, creating pumpkin scones at home gives you the freedom to customize your recipe to perfection. Whether you adore an extra sprinkle of chocolate chips or prefer a glaze that’s slightly more on the tangy side, the choices are yours! This level of personalization might just turn those fall vibes into a delicious habit.
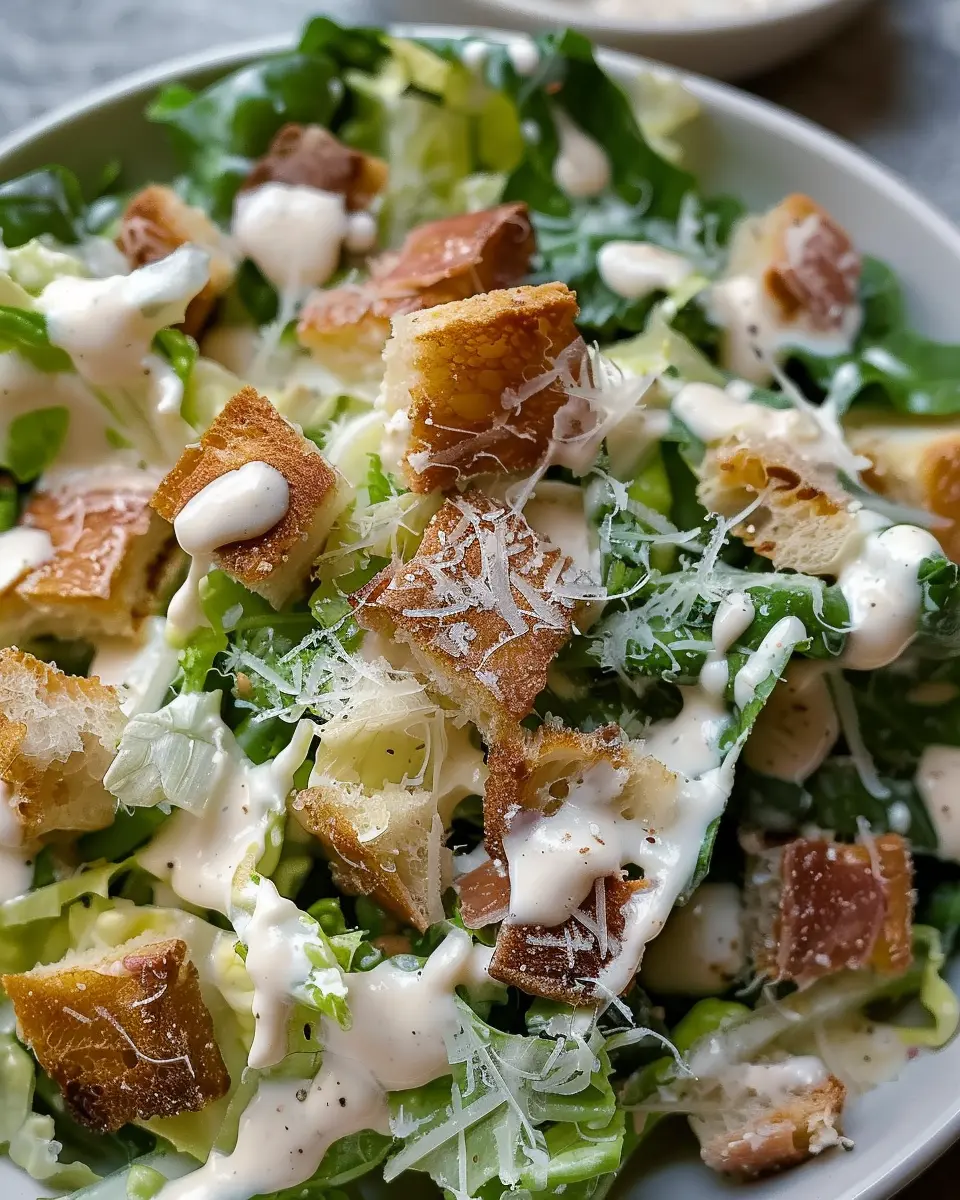
Did you know that pumpkin is not only tasty but is also packed with nutrients? It’s a fantastic source of Vitamin A, making your scones a treat that feels okay to indulge in, especially when shared with loved ones. Imagine serving your homemade scones at brunch, paired with Turkey Bacon, Chicken Ham, or even a light salad—which adds a healthy contrast to the rich scones.
Plus, whipping up a batch doesn’t require advanced baking skills; it’s pretty straightforward! Just a few simple ingredients and some kneading (which can even become therapeutic) will result in warm, fluffy scones that could rival those from your favorite café.
So, if you’re ready to channel your inner baker and impress your friends, let’s dive into this pumpkin scones recipe that’s not only easy to make but also deliciously satisfying. Get your aprons on and let’s get started!
Ingredients for Pumpkin Scones
Essential ingredients
Making delectable Pumpkin Scones at home starts with gathering the right essentials. Here’s what you’ll need for that perfect flaky texture and warm, spicy flavor:
- All-purpose flour: Provides the base of your scones.
- Pumpkin puree: This is the star of the show, lending moisture and flavor.
- Baking powder and baking soda: These leavening agents help your scones rise beautifully.
- Granulated sugar: Just a touch adds sweetness.
- Spices: A mix of cinnamon, ginger, and nutmeg creates that cozy autumn aroma.
- Butter: Cold, unsalted butter gives your scones a rich taste and flaky consistency.
- Heavy cream: For extra moisture and a tender crumb.
Optional add-ins
Want to take your Pumpkin Scones to the next level? Consider adding one (or more!) of these delightful mix-ins:
- Chocolate chips: Because who doesn’t love chocolate?
- Dried cranberries or nuts: They add a nice contrast in texture and flavor.
- White chocolate or butterscotch chips: For a sweeter twist.
Feel free to experiment—you might just discover your new favorite combination! For tips on scone-making techniques, check out this baking guide. Happy baking!
Step-by-step Preparation of Pumpkin Scones
Making Pumpkin Scones at home can be as delightful as sipping one at your favorite coffee shop. Follow this step-by-step guide, and you’ll be enjoying warm, fluffy scones in no time. Let’s dive into the process!
Gather your ingredients
Before you start baking, it’s essential to have everything you need on hand. Here’s a simple list of ingredients for your Pumpkin Scones:
- 2 cups all-purpose flour
- 1/2 cup granulated sugar
- 1 tablespoon baking powder
- 1/2 teaspoon baking soda
- 1/2 teaspoon salt
- 1 teaspoon pumpkin pie spice (or a mix of cinnamon, nutmeg, and ginger)
- 1/2 cup cold unsalted butter, cubed
- 1/2 cup canned pumpkin puree (not the pumpkin pie filling)
- 1/4 cup heavy cream (or your dairy alternative)
- 1 large egg
- Optional: chopped walnuts or chocolate chips for a special touch
Having these ingredients prepped in your kitchen not only saves time but also makes the whole baking experience smoother. Trust me, that feeling of knowing you’ve got all the components in place is half the battle won!
Combine dry ingredients
Now that you have your ingredients ready, let’s tackle the dry mix. In a large mixing bowl, whisk together:
- Flour
- Sugar
- Baking powder
- Baking soda
- Salt
- Pumpkin pie spice
Mixing these dry ingredients thoroughly will help ensure that your scone dough is uniform and fluffy. A pro tip? Use a sift to aerate your flour if you have one on hand. This can help make your baked goods even lighter!
Mix in the wet ingredients
Once your dry ingredients are well combined, it’s time to add in the delicious wet ingredients. In a separate bowl, whisk together:
- Pumpkin puree
- Heavy cream
- Egg
Next, take the cubed butter and add it to the dry mixture. Using a pastry cutter or your fingertips, work the butter into the flour until the mixture resembles coarse crumbs. This step is vital for achieving that flaky texture we love in Pumpkin Scones.
After that, pour the wet ingredients into the dry ingredients and mix gently. Be careful not to overwork the dough; this could lead to tough scones instead of the tender morsels you’re craving.
Shape the scones
After combining everything together, you’ll have a dough that should be slightly sticky but easily manageable. Turn it out onto a lightly floured surface and gently flatten it into a circle, about 1-inch thick. Use a sharp knife to cut the circle into wedges, or use a cookie cutter for fun shapes!
Place the shaped scones on a parchment-lined baking sheet. If you’re feeling adventurous, brush the tops with an extra splash of heavy cream and sprinkle sugar on top for a crunchy finish.
Bake to perfection
Now that your scones are beautifully shaped and ready, it’s time to bake. Preheat your oven to 425°F (220°C) and place your scones in the oven. Bake them for about 15-20 minutes, or until the edges are lightly golden.
Make sure to keep an eye on them as they approach the end of their baking time; the last few minutes can make a big difference!
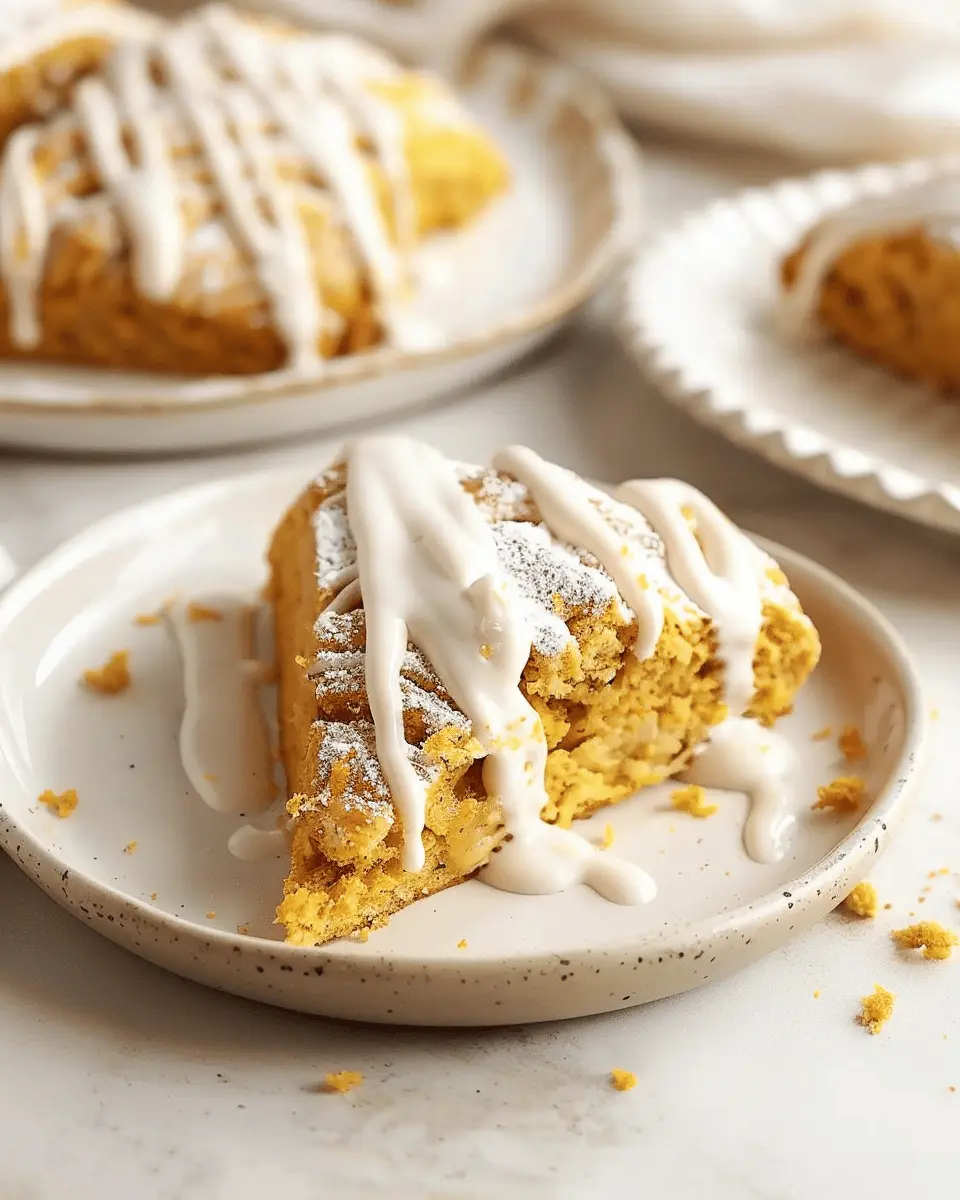
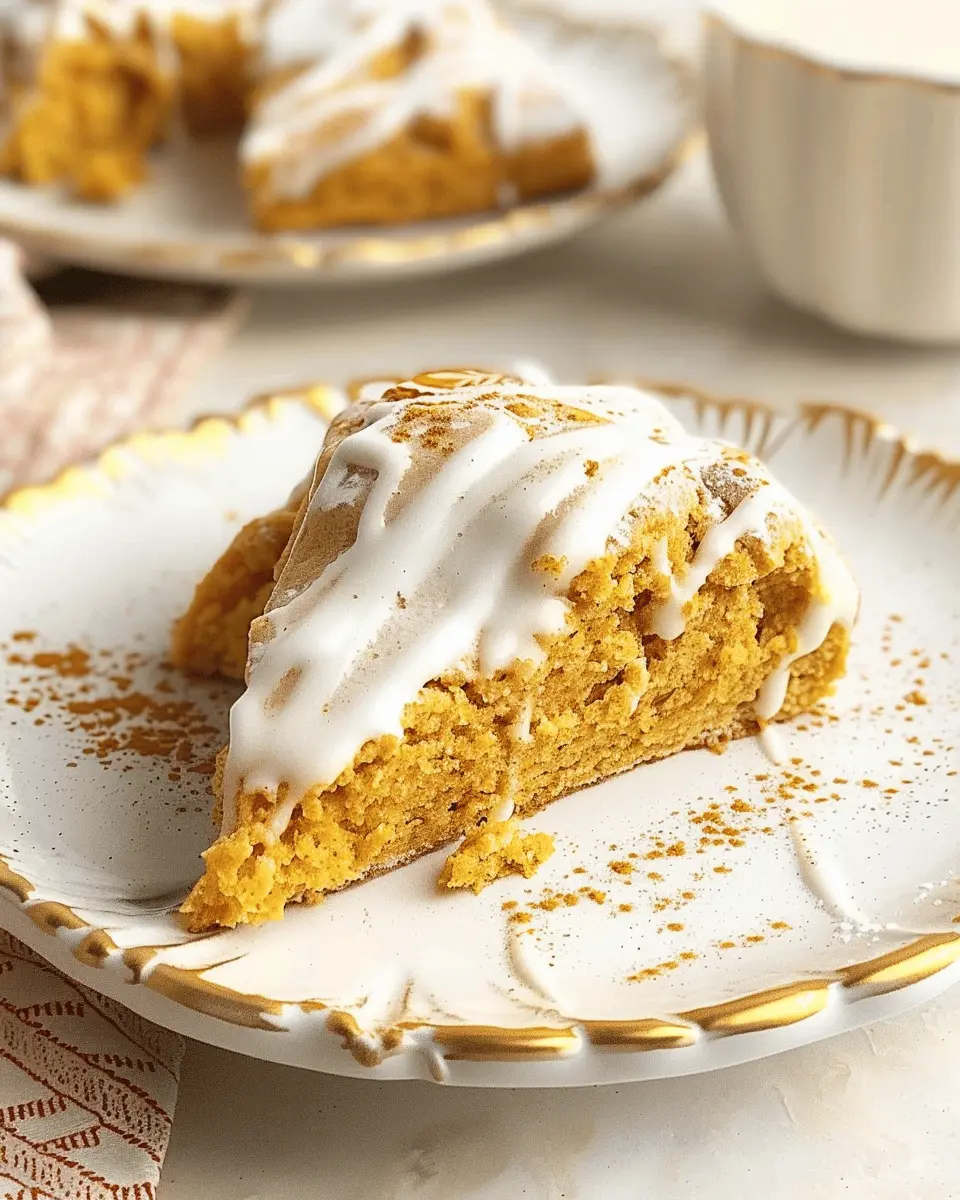
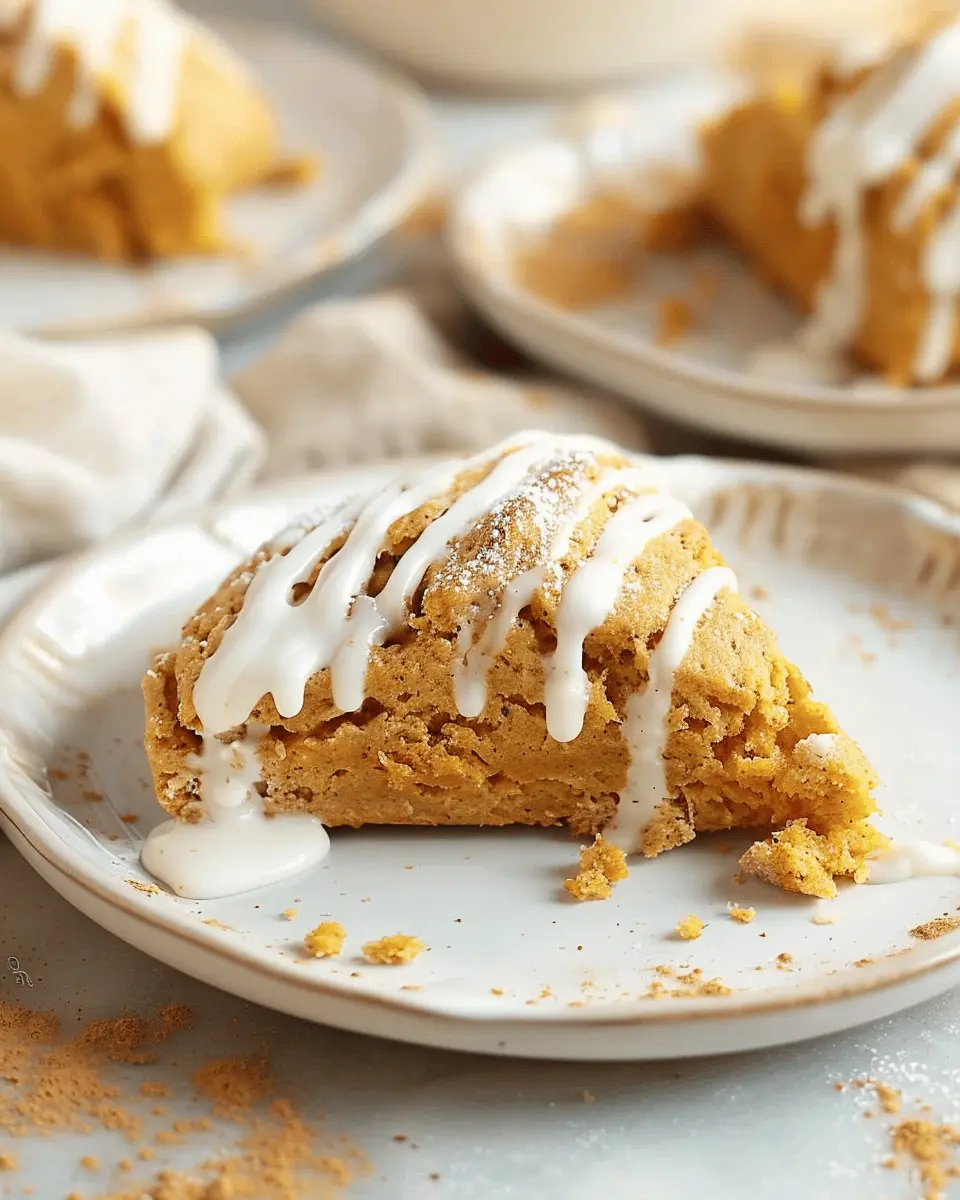
Once they’re out of the oven, let your Pumpkin Scones cool for a few minutes on a wire rack. Serve them warm, ideally with a pat of butter or a drizzle of cream cheese glaze, and enjoy the fruits of your labor.
With a little patience and care, you’ve transformed simple ingredients into something magical!
For extra tips and tricks on perfecting your scone-making, check out this resource. Enjoy your baking adventure!
Variations on Pumpkin Scones
When it comes to pumpkin scones, the possibilities are nearly endless! Let’s explore a few delightful variations that will add a personal twist to your baking and impress your friends.
Pumpkin Scones with Nuts
If you enjoy a bit of crunch, consider adding nuts! Chopped pecans or walnuts make for an excellent addition to your pumpkin scones, enhancing their texture and flavor. They bring a warmth that complements the spices perfectly. Just fold in about half a cup of your favorite nuts right before baking. Not only do they introduce healthy fats into your treat, but they also pack a delightful nutritional punch. For additional nut inspiration, check out this guide from the American Heart Association.
Spiced Pumpkin Scones
For those who want to up the ante on flavor, spiced pumpkin scones are the way to go! You can play around with additional spices like cardamom, ginger, or even a pinch of cayenne powder for a surprising kick. A sprinkle of all-spice or cloves can also elevate the autumn vibe in your scones. Experimenting with spice blends can open up a world of bold flavors that celebrate the season!
Glazed Pumpkin Scones
A sweet glaze can take your pumpkin scones to the next level! Simply mix powdered sugar with a splash of milk (or even a bit of maple syrup for more flavor) until smooth and drizzle it over your warm scones after they cool slightly. This adds a lovely finishing touch and a delightful sweetness that complements the spiced pumpkin.
These variations on pumpkin scones offer something for everyone. Whether you add crunch with nuts, amp up the spice, or finish with a sweet glaze, you’re sure to create a delightful treat that will be hard to resist!
Cooking Tips and Notes for Pumpkin Scones
Ideal Baking Tips
To master your Pumpkin Scones, use chilled ingredients—particularly butter and cream. Cold butter helps create a flaky texture, while buttermilk gives scones that rich flavor. Don’t forget to gently incorporate your dry ingredients; over-mixing can lead to tough scones. When shaping your dough, a light hand is key. You want to keep that tender crumb!
Common Mistakes to Avoid
Every baker stumbles now and then. Here are some common pitfalls to steer clear of:
- Using canned pumpkin pie filling: Ensure you grab plain canned pumpkin for an authentic taste.
- Skipping the chill: Letting your dough rest in the fridge for about 30 minutes can greatly enhance the texture.
- Not using enough spice: Pumpkin scones deserve a punch of flavor! Feel free to adjust your spice levels to suit your palate.
Don’t forget to check out this article on baking scones for even more insights. With these tips in hand, you’re set for a delightful baking experience that rivals your favorite coffee shop!

Serving Suggestions for Pumpkin Scones
Pairing with drinks
These delightful Pumpkin Scones shine when paired with the right beverages. For a cozy fall vibe, enjoy them with a hot cup of spiced chai or a classic pumpkin spice latte—the familiar flavors beautifully complement each other. If you prefer something more refreshing, try pairing them with a cool, homemade cold brew coffee or apple cider; both offer pleasant contrasts to the sweet, spicy notes of the scones.
Breakfast or snack ideas
While they’re perfect for breakfast, you don’t have to reserve Pumpkin Scones just for the morning. Enjoy them as a mid-afternoon snack with a smear of cream cheese or a fluffy spread of honey butter. These treats are also a hit at gatherings; cut them into smaller pieces for an elegant touch at brunches or holiday parties. Imagine sharing a plate of warm scones with friends over a leisurely weekend catch-up! For more inspiration, check out Food52 for creative serving ideas.
Time Breakdown for Pumpkin Scones
When you’re in the mood to whip up some delicious Pumpkin Scones, it’s good to know how much time you’ll need to set aside. Here’s a convenient breakdown to help you plan your baking session.
Preparation Time
Getting your ingredients ready and mixing the batter takes about 20 minutes. It’s the perfect time to crank up your favorite playlist. You’ll find that prepping your scones can be surprisingly enjoyable!
Baking Time
Next up, the oven time: you’ll want to set aside 15-20 minutes for the scones to bake to golden perfection. Keep an eye on them in those last few minutes to catch that perfect rise.
Total Time
In total, expect about 40-45 minutes from start to finish. This means you can enjoy your warm, homemade Pumpkin Scones with a cup of tea or coffee in no time!
For those looking to dive deeper into the world of scones, consider checking out this comprehensive guide from BBC Good Food. Happy baking!
Nutritional Facts for Pumpkin Scones
When you’re enjoying these delightful Pumpkin Scones, it’s good to know what you’re treating yourself to. Each scone contains approximately 210 calories, making it a convenient snack for your busy day.
Key Nutrients
These scones are not just tasty; they boast essential nutrients such as:
- Vitamin A: Great for your vision and immune health.
- Fiber: Aids in digestion and keeps you feeling full.
- Iron: Important for energy levels and overall vitality.
Suggested Serving Size
One scone is the perfect serving size to pair with your morning coffee or tea. If you’re sharing, consider cutting the scones in half so everyone can indulge a little without overdoing it.
For more detailed nutritional information, check out this source that provides valuable insights on food data.
Remember, enjoying a Pumpkin Scone is about balance—savor every bite!
FAQ about Pumpkin Scones
How can I make my scones lighter and fluffier?
Achieving light and fluffy Pumpkin Scones is all about technique! Here are some tips to consider:
- Handle the Dough Gently: Overmixing can lead to dense scones. Stir just until the ingredients are combined.
- Cold Ingredients: Use cold butter and cold pumpkin puree; this helps create steam pockets during baking, resulting in a fluffier texture.
- Leavening Agents: Ensure your baking powder is fresh. An expired leavening agent can cause your scones not to rise properly.
For more in-depth baking techniques, consider checking out this article from King Arthur Baking.
Can I use fresh pumpkin instead of canned?
Absolutely! Using fresh pumpkin in your Pumpkin Scones can enhance the flavor. Just remember to cook and puree the pumpkin until smooth before using it in your recipe. This ensures you get that lovely, rich pumpkin flavor without adding excess moisture.
If you’re considering this option, you might want to read how to roast pumpkin for some helpful tips!
What’s the best way to store leftover scones?
To keep your Pumpkin Scones fresh and delicious:
- Room Temperature: Store them in an airtight container for up to 2 days.
- Refrigeration: If you want them to last a bit longer, you can refrigerate them for up to a week.
- Freezing Tips: For longer storage, freeze them individually wrapped. Simply pop them in the microwave or oven to reheat, and they’ll taste like they just came out of the oven!
With these tips in hand, you’re ready to whip up a batch of delightful Pumpkin Scones. Happy baking!
Conclusion on Pumpkin Scones
Summarizing the delights of homemade pumpkin scones
When it comes to enjoying the flavors of fall, nothing quite beats homemade pumpkin scones. These delightful pastries are not only a scrumptious treat, but they also fill your kitchen with a warm, cozy aroma that evokes the spirit of the season. Whipping up a batch at home allows you to control the ingredients, ensuring they’re fresh and tailored to your taste.
Imagine savoring a rich scone paired with a hot cup of coffee or tea; it’s an experience unlike any other! Whether you’re sharing them at a brunch or enjoying a quiet evening in, these pumpkin scones are sure to impress. Ready to bake?
For more baking tips and ideas, check out resources like King Arthur Baking for their extensive range of recipes and guides!
PrintPumpkin Scones: Easy Starbucks Copycat Recipe to Impress at Home
This Pumpkin Scones recipe is a delightful Starbucks copycat that you can easily make at home.
- Prep Time: 15 minutes
- Cook Time: 20 minutes
- Total Time: 35 minutes
- Yield: 8 scones 1x
- Category: Dessert
- Method: Baking
- Cuisine: American
- Diet: Vegetarian
Ingredients
- 2 cups all-purpose flour
- 1/2 cup brown sugar
- 1 tablespoon baking powder
- 1 teaspoon cinnamon
- 1/2 teaspoon nutmeg
- 1/2 teaspoon salt
- 1/2 cup unsalted butter, cold and cubed
- 1/2 cup pumpkin puree
- 1/4 cup heavy cream
- 1 teaspoon vanilla extract
- 1/4 cup maple syrup for drizzling
Instructions
- Preheat the oven to 400°F (200°C) and line a baking sheet with parchment paper.
- In a large bowl, mix the flour, brown sugar, baking powder, cinnamon, nutmeg, and salt.
- Add the cold butter and mix until the mixture resembles coarse crumbs.
- In another bowl, combine the pumpkin puree, cream, and vanilla.
- Pour the wet ingredients into the dry ingredients and stir until just combined.
- Turn the dough onto a floured surface, knead gently, and shape into a circle about 1-inch thick.
- Cut into triangles and place on the prepared baking sheet.
- Bake for 15-20 minutes until golden brown.
- Let cool slightly and drizzle with maple syrup before serving.
Notes
- Serve warm for the best taste.
- These scones can be enjoyed with cream cheese or butter.
Nutrition
- Serving Size: 1 scone
- Calories: 220
- Sugar: 8g
- Sodium: 150mg
- Fat: 10g
- Saturated Fat: 6g
- Unsaturated Fat: 2g
- Trans Fat: 0g
- Carbohydrates: 30g
- Fiber: 1g
- Protein: 3g
- Cholesterol: 30mg
Keywords: Pumpkin Scones, Starbucks Copycat, Pumpkin Recipes, Fall Recipes